Sunday, December 2, 2007

Fair Style Sausage Rolls

I love historical Fairs. Come summer time, Renaissance Pleasure Faire calls to me with its knights in shining armor, jousting, crazy hats and what not. In the winter time, San Francisco's Dickens Christmas Fair beckons with its Victorian England streets, filled with Dickens characters and holiday merriment.

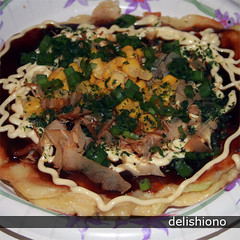
But more than all this, I love the food! British food is often times snubbed for being plain and flavorless which I simply don't think is the case. Ren Faire's medieval setting tempts the palate with its no utensils eating with things like thick cut bread, cheese and sausage (yum) and gigantic turkey legs. Dickens Fair often has wonderful selections of meat pies, pasties, afternoon tea and other delights.

One of my favorites served at both events is the humble sausage roll. As I know it, the sausage roll is simply a bit of sausage meat, rolled in flaky pastry. I prefer mine plain however there's almost always a huge jug of either brown sauce or ketchup just waiting to accompany it.

Sadly, sausage rolls aren't popular in the US as they are in the UK or Australia where they are corner store staples. Fair season is usually limited to late summer/winter here which means that a sausage roll craving can go unfulfilled for quite awhile during the year. And with admission usually more than $20/per adult and food prices also being expensive, it's a bit impractical to go to a Fair just to eat. (And that doesn't include gas, travel time and parking!)

In order to fulfill a particularly bad craving for sausage rolls in the springtime, I set out to recreate the rolls on my own. Working off the assumption that sausage rolls are nothing more than an over glorified pigs in a blanket, I found myself with a tube of ready made cresent roll dough and a pack of pre-cooked British style bangers. (Excuse me while my inner 12 year old giggles stupidly. Hehehe. BANGERS.)

The resulting rolls were tasty but still not quite what I remembered. The buttery cresent rolls were yummy and the bangers had the exact flavor of the meat in the Fair rolls. However the sausage to pastry ratio was simply too much for me and the rolls weren't flaky. Still, they satisfied the craving and I filed away my love of sausage rolls for another time.

A few days ago, I found myself poking through AllRecipes.com and the featured recipe of the day was for someone's British-style sausage rolls. The recipe called for premade, uncooked sage sausage wrapped in puff pastry. I realized that was where I had gone wrong with the previous attempt. It should have been puff pastry! Duh. Needless to say, on my next shopping trip, I set out to buy the ingredients to attempt the sausage roll, again. This time I'm happy to report that I've made terrific success and I'm happy to pass the knowledge along to others.

Fair Style Sausage Rolls
Makes 8

  • 1 box of pre-made puff pastry
  • 1 pack of pre-cooked British-style sausage (Bangers)
  • 1 egg, beaten

Preheat your oven to 400F

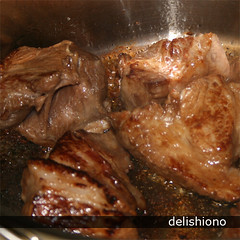
Cut your sausages in half lengthwise and remove the casing. Thaw your puff pastry as recommended on the box. When thawed, unfold and wrap each sausage half in pastry, pinching the edges to seal.

Line a baking sheet with parchment and then place pastry wrapped sausage onto the parchment. Brush the tops of the wrapped sausage with egg wash and bake for 20 minutes until golden brown. Cool for a few minutes before enjoying. These can be served warm or at room temperature.

To reheat refrigerated cooked sausage rolls: Bake at 300F for 20 minutes.

The rolls at Fair tend to cost somewhere in the neighborhood of $3 ~ $5 each. This recipe will make 8 at approximately $1.30 each. Not bad, eh?

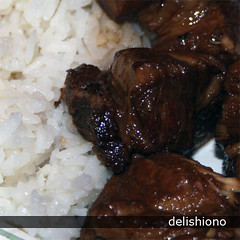
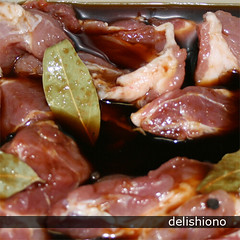
For reference sake, I used Pepperidge Farm puff pastry and Saags British Bangers. Saags are pre-cooked and come four to a pack. British style bangers aren't easy to find where I live so I'm pretty much SOL if I wanted to find raw sausages.

The Pepperidge Farm package came with 2 sheets of puff pastry and I was able to wrap four halves in each sheet but I had to get pretty creative when it came to wrapping the sausages. Pepperidge Farm puff pastry comes folded into thirds and the folds remain visible even when unfolded. There was lots of pinching and sealing to be had come the last sausage in each sheet as well as supplement patches of pastry, trimmed from the other sausages. In the end, I couldn't tell what got patched where and honestly, didn't care. After all, these are meant to taste good and not win any aesthetic awards.

This recipe is pretty flexible and can be used with other pre-cooked sausages. I haven't tried it with uncooked sausage myself though I'm sure it can be done. I just like the pre-cooked sausages because it prevents the grease from getting into the pastry. :)

Thursday, November 8, 2007

Okonomiyaki Party

okonomiyaki01

My favorite get togethers involve food especially when someone else is cooking! Despite never having had "real" Osaka-style okonomiyaki (ie. in Osaka or Japan) I love the stuff. I've also found that it makes for a great "make-it-yourself" party food. Just prepare the batter, fillings and toppings ahead of time, set out hot plates and instructions and just let your friends cook their own damned food!

For an okonomiyaki party, I provide:
  • Okonomiyaki batter
  • Eggs
  • Shredded cabbage and/or chopped kimchee
  • Various batter add-ins, meats, toppings
Here's a list of stuff I try to provide for okonomiyaki parties, budget and time willing. In addition to this, I also like to make up a batch of yakisoba so that people can make modern-yaki if they so choose.
Batter add-ins
  • Cooked bacon bits (optional)
  • Shredded cheese (optional)
  • Baby shrimps (optional)
  • Tenkasu/tempura bits (optional)
Meat
  • Bacon (thin sliced)
  • Beef (thin sliced)
  • Sausage (thin sliced)
  • Spam (thin sliced)
Toppings
  • Okonomiyaki sauce
  • Kewpie Mayonaise
  • Aonori (seaweed flakes)
  • Bonito flakes
  • Chopped Green Onions (optional)
  • Shoga (pickled ginger)
  • Corn kernels
I confess: I use a ready made mix for the okonomiyaki batter. Just add water. Since I've always done okonomiyaki for parties, I haven't really had the opportunity to experiment with non-ready made okonomiyaki mix lest it come out icky. The most important ingredient in the okonomiyaki batter is the 山いも (yamaimo) or mountain yam. It is what gives the okonomiyaki its texture and taste.

When looking for okonomiyaki batter mixes in your Japanese grocery store, look for it in the section that has other ready made mixes such as pancake mixes. (Don't substitute pancake mix for okonomiyaki mix. It's the wrong flavor and texture for this.) I've discovered that more general Asian markets tend not to have it in stock but it's always worth a shot if you don't have a Japanese grocery store near by. Always make sure that the mix includes "mountain yam" or "yamaimo" in the ingredients list. Otherwise, you won't have the same texture or flavor that you should.

If you don't have access to a Japanese grocery store to find okonomiyaki mix, Kirk of mmm-yoso has a great looking recipe that includes yamaimo here:
http://mmm-yoso.typepad.com/mmmyoso/2006/05/okonomiyaki.html

I've found that most general Asian markets will have "nagaimo" or "yamaimo" in stock in their fresh produce section. Where I am, they're usually packaged in pre-wrapped, single packages and may have a covering of sawdust on them.

Fillings and toppings are very much up to everyone's taste. At the very least, I provide green onions, okonomiyaki sauce and kewpie mayonaise. I have an indecent love for kewpie, as evidenced by the many times I've asked for extra mayo at Izumiya in San Francisco and consequently have been given a bowl to dip my okonomiyaki in. It sounds gross but I love it!

For parties, I've found it's good to either demonstrate or (if you have the time/energy/want to) you could print out instructions or designate a short-order chef. What follows are the instructions I wrote up for my latest okonomiyaki party (but didn't get to use) ;) Feel free to change it to suit your party.

* *
OKONOMIYAKI お好み焼き literally means "Grill as you like"
Here it means: Cook your own damned pancake! :)

Often compared to pizza for its customizability, okonomiyaki has several styles, depending on where in Japan you're eating. We're going to do the Kansai style of okonomiyaki which is basically a savory pancake filled with cabbage and other yummy things.

Step 1: Mixing it up!
Scoop a ladle full of batter into the bowl
Add one egg
Add some cabbage or kimchee (or both)

You can also add all/some/none of the optional filling ingredients to the batter.
  • Bean sprouts
  • Chopped Green Onions
  • Cooked bacon bits
  • Shredded chees
  • Baby shrimp
  • Chopped fake crab
  • Tenkasu/tempura bits

If you find the mixture too thick and chunky, you can add more batter. It all depends on how much dough to filling you'd like.

Mix up the okonomiyaki batter, eggs and fillings in the bowl until well blended.

Step 2: Cooking It!

Oil up the ho
t plate with a good amount of cooking spray and spread the batter evenly.

While the batter is cooking, lay a few pieces of the meat (bacon, sausage, spam, etc.) onto the cooking pancake.

Let it cook on the first side for about 3 minutes and then flip (carefully) and cook on the other side for about 3 to 4 minutes to make sure that the meat is completely cooked. Feel free to squish the pancake every now and then to make sure it's cooked

Step 3: Topping it!
Once your okonomiyaki is cooked, remove it to a plate (I suggest meat side up) and start topping it.

Your choice of toppings are:
  • Okonomiyaki sauce
  • Kewpie Mayonaise
  • Aonori (seaweed flakes)
  • Bonito flakes
  • Benishoga (pickled ginger)
  • Corn kernels

For traditional Osaka-style okonomiyaki, top it with some okonomiyaki sauce and mayo and a sprinkling of aonori and bonito flakes. Watch as the bonito flakes start to move on their own from the heat. Oooh, spooky.

Otherwise, top to your hearts content and then pig out!

For the advanced folks - モダン焼き(modern yaki)
Fry up an okonomiyaki like you usually would

Next to it, fry up an over medium egg.

Remove the okonomiyaki to a plate. Top with a generous amount of yakisoba. Top the yakisoba with the egg. Top the egg with the various okonomiyaki toppings of your choice.

Pig out and then roll around in the blissful, carb induced coma that you'll find yourself in later.

Pork Adobo

Pork Adobo

Growing up Filipino, pork adobo was one of those foods I took for granted. Like it or not, it was one of those dishes that regularly showed up on the table. After I moved away from my parents home, I found myself craving adobo every now and then but couldn't stomach the idea of eating restaurant adobo. For one, it was often far too expensive for what it is. Furthermore, I am of the zealous opinion and that most Filipino food is far better cooked on the home stove than enjoyed in a restaurant though I am happy to report that more Filipino cooks are expanding into the restaurant business with great success, especially in the SF Bay Area.

Even so, adobo is one of those memory evoking dishes that most Filipinos are adamant about what it should be and how it should taste. Adobo, like many things, is a family recipe, handed down through the generations and jealously guarded. One family's adobo may be a straight forward dry stew of chicken and pork whereas another's may have sauteed onions and potatoes swimming in a rich broth. What remains constant amongst most Filipino recipes is the necessity for soy sauce, vinegar, garlic, peppercorns and bay leaves. These are the main flavoring ingredients. The extras and cooking method are what varies greatly between families.

I often see adobo listed as a braised dish but that varies from family to family. Traditionally, braising calls for the searing of the meat and then being cooked slowly in an acidic broth. Many recipes for adobo that I've seen actually do this in reverse: first the meat is cooked in the vinegary marinade, removed from the cooking liquid, pan fried and then the sauce is returned to the pan to reduce. Some recipes ignore the pan frying all together and just cook the meat in the marinade and serve.

My perfect adobo with rich pieces of braised meat sitting in a deep mahogany broth. Chicken is fine and good but for me, pork is the ultimate adobo meat. When done right, the meat is full flavored and tender with the connective tissue and fat melted away into mouth filling bliss.

This is my version of this classic dish. It's quite a bit more work than the adobo my parents made while I was growing up. But the rich broth and meat make it totally worth it every second. Also note that adobo is one of those dishes that actually tastes better on the second or third day.

I also happen to like potato in my adobo, an addition I didn't know about until I had the adobo that my ex's mother made. Some people don't like potato because it's such an obvious filler ingredient but I love it because it soaks up all the cooking juices and tastes delicious. I omitted it here because I couldn't find my vegetable peeler today.

Pork Adobo
  • 2 lbs pork butt, cut up into 1 inch cubes
  • 1/2 c white vinegar
  • 1/2 c soy sauce
  • 1/2 c unsweetened pineapple juice
  • 2 tbsp whole pepper corns
  • 6 garlic cloves, smashed
  • 3 bay leaves

adobo-process01

Make your marinade by combining the vinegar, shoyu, pineapple juice, pepper corns, garlic and bay leaves. Pour over your pork butt and then marinate for one hour. Do not marinate too long as the acide from the vinegar and pineapple juice will begin to chemically cook the meat.

adobo-process02 adobo-process03

Pre-heat your oven to 325F. Remove your meat from the marinade and drain, reserving the marinade as this will also be your braising liquid. In an oven safe pot or dutch oven, heat about a tablespoon of oil at about medium high. Brown your drained meat in batches, making sure not to crowd the pan.

adobo-process05 adobo-process06

Once all the meat has browned, deglaze the pan with the marinade, making sure to scrape all the browned bits off of the bottom. Return the meat to the pan. Cover and cook in the oven for 30 minutes until the pork is cooked through and tender.

Serve with white rice.

Defatting the broth (optional)

If you're watching your fat/cholesterol intake (and who isn't?) you may want to defat your broth. Otherwise, you may have a copious layer of fat sitting right on top of your adobo broth which isn't appetizing at all.

Place meat and broth in separate containers and let cool for 15 minutes and then store in the fridge for at least 6 hours if not overnight to let the fat harden. Skim off the fat layer.

Variations:

Want chicken adobo? Easy, just substitute the 2lbs of pork butt for an equal amount of chicken parts. Bok bok.

If you can't oven braise (because your pan isn't oven safe), just simmer the meat and cooking liquid together for 30 minutes on medium to medium low.

If you want a no-fuss version, this can easily be cooked in a crock pot. Just dump the meat and marinade in the crock pot and set on low for 10 hours or high for 4 hours.

About the Ingredients

My preferred soy sauce is Kikkoman because it's great as both a cooking soy sauce and an eating soy sauce so I always have on hand. Feel free to use your favorite brand of soy sauce. I'd advise using low sodium soy sauce. That stuff is just nasty but if you must, you must.

If you live in an area with a Filipino market, you can find Filipino brands of vinegar. Personally, I don't bother as I'm not too fond of the taste. I blame my American palate. I just use the regular distilled white vinegar you find in the local American megamart since this is what my parents always used when I was growing up.

The pineapple juice is a departure from traditional ingredients but is seen in some in Filipino-Hawaiian recipes. I like it because it mellows out the salty soy sauce and sharp vinegar. Some recipes include brown sugar for the same effect. I don't use brown sugar because it carmelizes too much during the pan searing process.

Could you use lean cuts of meat like pork tenderloin or chicken breasts for adobo? Of course. But in doing so, you'll find that your meat will be tender but dry. In order to stay moist, the meat should have some fat on it even if you don't eat it.

For chicken adobo, I use thighs and drumsticks with the skin on and then remove the skin after cooking. Remember that chicken has a membrane on it that keeps fat from soaking into the meat so peeling off the cooked skin is fine.

For pork adobo, I use pork butt, trimming the pieces that are obviously far too fatty.

Sunday, October 21, 2007

Potato Bacon Frittata

As a young professional, starting out on her own, I didn't have much in the way of cookware. My first pot and pan were actually hand me downs from my husband's bachelor kitchen. His bachelor kitchen was comprised of what we call "survival gear." He had exactly one pot, one pan and one bowl. Plus a knife, a fork and a spoon and two plastic plates. No, he didn't cook much. I made him chicken parmigiana on that measly bit of equipment on the first night we actually spent time a good amount of time together.

Over the years, I've accumulated a few pieces of cookware. The first few years were pretty lean and about the best I could afford was whatever non-stick cookware happened to be on sale at our local Target. As they say, you get what you pay for and I must have gone through three or four sets of sub-par cookware in the last few years.

I've always longed for a good set of oven safe, stainless steel cookware but never could afford the All Clad that I salivated over. But serendipity smiled on me this summer. Thanks to a lovely anniversary gift certificate from my parents as well as a massive sale at Macy*s, I was able to get myself a great set of Cuisinart stainless steel cookware. It's my first set of stainless steel cookware and if the reviews are correct, this set is only second to All Clad. Over the few weeks that I've been using them, I've been very satisfied and I predict that my cookware and I shall make many happy meals together.

In the spirit of trying to use up some of the random leftover ingredients I have laying about, I decided to make a frittata for my lunch tomorrow. I'd never made a frittata before, mostly because I never had oven safe cookware. But now that I do have oven safe cookware -- and had a massive need to make some kind of edible lunch for work -- I decided to experiment.

  • 1 large russet potato, baked and diced into 1/2 inch chunks
  • 2 slices thick cut bacon, diced
  • 1 shallot, minced
  • 1 garlic clove, minced
  • 3 eggs
  • 1/4 c milk
  • 2 tbsp Parmesan cheese

Pre-cook your potato by scrubbing it and either boiling it, baking it or nuking it. Let the potato cool and dice into 1/2 inch chunks. Whether you keep the skin or not is completely up to you.

Preheat the oven to 350F

In an 8" oven safe skillet, fry diced bacon over medium heat until the bacon is crisp. Remove bacon from pan with slotted spoon. Sweat the shallot and garlic clove in the rendered bacon fat until translucent and fragrant. Add the potatoes and bacon back into the pan and stir to coat the potatoes in the bacon fat. Season with salt and fresh ground black pepper.

In a separate container, beat the eggs and milk together. Stir in the parmesan cheese and season the egg mixture with salt and pepper. Add the egg mixture directly to the skillet. Place the skillet in the oven and bake for 20 minutes.

Remove from oven and let cool and set for 15 minutes. Remove to plate and cut into wedges to serve warm.

* *

Overall, I'm pretty happy with how this little experiment came out. Like most things, it's important to season all elements of the dish well or else it will turn out bland. I was a little concerned that the eggs wouldn't release from the pan easily or would burn but the gratuitous use of bacon fat prevented that. If you're cholesterol conscious, you could pour off the bacon fat and replace it with olive oil or something but I'm a firm believer in the power of bacon to make just about anything better. However the bacon element does make this a little strong so I'll be eating this with rice. (Yeah, double starch. I know, I know. Carbs are the enemy... unless you're me in which case they're your bestest friends in the entire food world. YUMMY.)

Perfect Iced Tea

Iced tea is a staple in our household because it's wickedly cheap and it tastes good. We make it by the gallon and are usually out by mid-week. The beauty of iced tea for us is that there's always an endless store of tea to choose from since I'm a tea freak and almost always have the pantry stocked with various black and green teas.

As far as iced tea in the United States goes, it's a sad state of affairs. Most of the time, pre-sweetened iced tea is a fountain drink, reconstituted from cloyingly sweet syrup. YUCK! I'm firmly convinced that only the American South knows how to brew and serve a decent iced tea. "The table wine of the South" as they call it is the wonderful sweet tea. Why only the South serves it fresh brewed and sweetened, I'll never know. (Being that my favorite beverages are iced tea and Coca Cola, I was pretty happy with my beverages choices when we visited Atlanta this past summer.)

Practically anywhere else in the US that offers real brewed iced tea offers it unsweetened, with a side of lemon and a plethora of sugar packets to help you on your way. As many a novice iced tea or lemonade maker knows, a cold drink doesn't help dissolve the sugar. I've spent far too many meals waiting thirstily for my sugar to dissolve before being able to gulp down my beloved iced tea.

The answer to this problem is simple. Simple syrup, that is. It's just a one to one ratio of sugar to water, already dissolved. This takes the work out of sweetening your iced tea or any other iced beverage. I like to keep simple syrup on hand for iced tea because I make unsweetened iced tea. While I love sweet tea, I can't have it as often as I like and need to watch my sugar intake. My husband, on the other hand, hates unsweetened tea and needs his sugar fix. I keep my sugar syrup in a handy squeeze bottle for ease of use.

The beauty of simple syrup is that you can flavor it however you like. Add lemon or mint if you like those flavors in your tea. Simple syrup also takes the work out of making lemonade or limeade.

For a gallon of unsweetened iced tea
  • 8 tea bags
  • 8 c hot water
  • 8 c cold filtered water
Heat 8 c of water until just under the boiling point. Steep 8 tea bags in the hot water for about 15 minutes to make a very strong tea. Remove the tea bags and let cool for another 5 minutes. Pour half of your cold water into your gallon container and pour in your hot tea. Pour in the rest of your cold water and stir to combine. Refigerate for 3 to 4 hours or until cold. Serve as desired.

For a gallon of Southern style "Sweet Tea"
  • 8 tea bags
  • 7 c hot water
  • 6 1/2 c cold filtered water
  • 1 to 1 1/2 c simple syrup
For true Southern "Sweet Tea" try to find "Luzianne" tea and follow their directions.

Otherwise, follow the directions for unsweetened iced tea above, except adding the simple syrup in with the cold water.

NOTE: Depending on where you are in the South, Sweet Tea can mean "tea sweetened with sugar" or "sugar water that looks like tea" (ie. Georgia.) Adding the full 1 1/2 c of simple syrup errs more towards the latter definition than the former so unless you like your tea that sweet, try adding only 1 c of the simple syrup first and adjusting to taste.

Simple Syrup (makes 1 1/2 c)
  • 1 c sugar
  • 1 c water
Heat your water to boiling and dissolve the sugar in the boiling water. Let cool slightly and then add to your iced tea (for Southern style "Sweet Tea")

OR

Cool completely and reserve in a serving container.

Tuesday, October 16, 2007

Omurice

オムライス aka Japanese omelette rice. It was one of those dishes that I'd see on Japanese menus and go "..." at. Ketchup, fried rice, omelette... and more ketchup? Ooohkay. I love ketchup just as much as the next average American but somehow the idea of ketchup fried rice failed to stir my taste buds.

I confess, the only reason I attempted to make it in the first place was because I saw it on either a dorama or anime that made it look good. It might have been ランチの女王 (Lunch Queen) but this might have been before that. In any case, never watch a food anime or dorama when hungry because you will probably go hunting for whatever food they're having.

The original recipe I followed was by Katsuo Kobayashi. (Since it's part of a cookbook, I won't replicate the original here.) It was a pretty classic recipe: ketchup flavored fried rice wrapped inside a

As an aside, I just love Kobayashi-san. Her translated books are very easy to read and follow and the recipes have a home cooked taste. None of that pretentious stuff. I first saw her on the original Iron Chef when she went up against Iron Chef Kenichi (Chinese) during Battle Potato. It was hilarious to see a little おばあちゃん running around the kitchen, cooking a whopping 11 dishes in an hour, fairly effortlessly with time leftover to see if Iron Chef Kenichi needed help. She won, by the way :)

Once it became part of my routine, I'd gotten kind of frustrated with it. For one, getting a perfectly thin, flexible omelette that wasn't always easy and getting the rice folded neatly around it in a perfect, football shape was next to impossible. Plus I wasn't always happy with the fried rice portion. Some tweaking was definitely in order.

One day, while watching Good Eats, I watched Alton's omelette technique which I realized was the same technique used in Lunch Queen and also Tampopo. In this case, I wouldn't be putting the rice in the omelette but rather I'd be making the rice first and then topping it with the omelette. No more frustrating wrapping!

So here is my latest attempt at making omurice. It's not perfect but my husband and I are quite happy with it. He likes it because there's a better rice to egg ratio. He noted in previous versions, there wasn't always all that much rice to go with the egg because it wasn't easy to wrap the rice neatly. I included bacon in the fried rice recipe because, well, (almost) everything is better with bacon! (Yum.)

* *

Michelle's Omurice
Serves 2

2007-1017-omurice-ingredien

Fried Rice
  • 1 thick slice bacon, diced
  • 1 shallot, minced
  • 1 garlic clove, minced
  • 1/4 c red pepper, diced
  • 1/4 c cooked chicken, diced
  • 2 cups cooked rice
  • 2 tbsp ketchup

Omelette (per serving)
  • 2 eggs, beaten

To make the fried rice

Sautee the diced bacon over medium to medium high heat until brown and crispy. Turn down the heat to medium and add in the shallot, red pepper and garlic, sauteeing until the shallot is translucent, about one minute. Add in the chicken and toss in the mixture until warmed through. Add more oil if needed and then add in the rice. Stir fry until rice is evenly coated. Add in the ketchup and stirfry again until the rice is evenly coated. Divide evenly between two plates and keep warm.

For the omelette

I can't really explain how to make the omelette except that I wasn't all that great at it. :x To give you an idea what I was going for, watch this video.

It's the omurice scene from Tampopo. :)


Once the omelette is done, top the rice with it, cutting it to spread it evenly over the rice. Top with the desired amount of ketchup and enjoy.

2007-1017-omurice-done

It sure doesn't LOOK perfect but it tasted great. And in the end, that's what counts :)

* *

ETA: Re: the mise en place with raw bacon on the plate with everything else... eh. It was going to be cooked all together anyway so no need to worry about cross contamination there. :)

Michelle's Zuppa Toscana

We don't go to Olive Garden all that often but when we do, my husband always orders the Zuppa Toscana. To be quite honest, I'm not all that fond of it as I always order the salad at OG which is my personal favorite :) I figured that Zuppa Toscana would be an excellent candidate for a good weekend meal. Plus it was a way for me to make something to go with my focaccia. :)

I like my version a whole lot more than Olive Garden's version. Also, it's tons cheaper than going to OG. You sure do get a whole lot more for your buck! And it makes a ton so I hope your family has a good appetite. Be forewarned -- this isn't a quick cook meal. It's definitely something to make on the weekend to enjoy for several days afterward.

* *
Michelle's Zuppa Toscana
Adapted from http://recipes.robbiehaf.com/O/573.htm


1 lb. Italian Sausage, casing removed
1/2 lb. thick-cut bacon, diced
4 c. water
32 oz. chicken broth, low sodium
1 1/2 large russet potatoes, scrubbed and diced (do not peel)
1 medium shallot, chopped
2 cloves garlic, minced
16oz. chopped spinach (frozen)
1 c. heavy whipping cream
sea salt & red pepper flakes to taste

In a heavy stock pot, brown sausage over medium-high heat. Make sure to break it into small pieces and to scrape up the fond (the delicious brown bits at the bottom) as you go. Once it is cooked through, remove the sausage from the pot and reserve.


Add the bacon to the pot and fry until brown and crispy. Remove the crispy bacon bits to the same place you reserved the sausage. Drain off all but 2 or 3 tablespoons of the bacon fat.


Turn your heat down to medium or medium-low and add your shallots, followed by your garlic. Sweat over medium low for about 2 to 3 minutes or until translucent. Deglaze the bottom of the pan with 1/2 c of the chicken broth, scraping the bottom of the pan to dissolve all the yummy brown bits into the soup.

Add your diced russet potatoes (drain if you have them stored in water to prevent oxidation like I normally do) and the 4 cups of water. Bring to a boil then lower to a simmer, cover and then simmer for 10 minutes until the potatoes are tender. Add in your spinach (no need to thaw) and stir in your whipping cream. Simmer (but do not boil) for another 5 minutes. Season with salt (I like sea or kosher) and red pepper flakes to taste.

Serve with a hearty bread for dipping and laugh heartily because now you don't need to wait for Olive Garden's all you can eat soup, salad and breadsticks special! MWAHAHAHAHA!

Zuppa Toscana (homemade)


Makes 10 (very generous) servings

* *

The original recipe called for spicy Italian sausage and kale, neither of which my local Trader Joe's had the day I went shopping. That wasn't a big deal so I just got the regular sweet Italian sausage and some frozen spinach. The original also called for onions -- which I don't normally use -- for which I substituted shallots.

If you want to do a low carb version of this, you can substitute cauliflower for the potatoes. For low fat, substitute half and half or whole milk for the whipping cream. I wouldn't suggest low fat or skim milk because it just won't lend any flavor to the soup at all.

Be sure to use good quality bacon. Don't use any of that namby-pamby, wet cured, thin-cut stuff.This will help ensure that you've got some really hearty bits of bacon left in your soup rather than having it all wither away into nothing. Your taste buds will appreciate it! I like Niman Ranch bacon (well, truth be told, I like Niman ranch anything) because it's the real thing: dry cured and thick cut. It's also a great price at Trader Joe's.

I actually misjudged just how much soup it was going to make and had to switch to a larger pot halfway through the cooking process. Considering that it's just me and my husband, we had enough leftover to fill three 3 cup containers and another 2 cup container. It made for very good leftovers but I wouldn't keep the leftovers for more than a few days. Unfortunately with the potatoes, it's not a good candidate for freezing as potatoes tend to get mushy after being frozen, thawed and reheated.

Saturday, October 13, 2007

Dulce de Leche Brownies


Bastardized from... um, I mean inspired by David Lebovitz's Dulce de Leche Brownie recipe and Cooking for Engineer's brownie recipe

  • 6 oz bittersweet chocolate
  • 6 oz butter, unsalted (1 1/2 sticks)
  • 1 c sugar
  • 3 eggs
  • 1 tsp vanilla
  • 1 c flour
  • 1 c dulce de leche
Preheat oven to 325F and butter and flour/cocoa an 8x8 brownie pan.

Beat eggs and vanilla together. Set aside.

Melt the butter and chocolate slowly in a double boiler. Once the butter and chocolate have melted together and are mixed together nicely, take off the heat. Mix in the sugar and then the egg mixture. Once that has been full mixed and incorporated, fold in the flour to form a thick batter.

Spoon 1/2 of the brownie batter in the bottom of the prepared pan. Spoon half the dulce de leche in blobs onto the brownie batter. Swirl with a skewer or knife. Spoon the rest of the brownie batter and repeat the process with spooning the dulce and swirling with a knife.

Bake for 35 ~ 45 minutes or until a toothpick comes out with fudgy crumbs. Cool on a wire rack completely before cutting into 2x2 squares.

Makes 16 brownies

* *

The original Cooking for Engineers brownie recipe called for 1.5 c of sugar which I reduced to 1 c. I thought that the dulce de leche would add enough sweetness to the batter and I was right. The still slightly bitter dark chocolate is well offset by the dulce de leche. Any more sugar and it would have been far too sweet.

My dulce de leche had been made ahead of time and I had taken it from the refrigerator. As I suspected, it was pretty blobbish and unspreadable. That was easily rectified by warming gently in a double boiler. I also thinned it out with just a splash of milk which made it easy to make it the same consistency as the batter.

I love the dual layer of dulce de leche in the brownies from the two swirled layers. It's nice to have dulce de leche both in the middle of the brownie and the top of the brownie. But I think I will make it in an 11 x 13 pan next time. Although I like the 2x2 size of the the brownies, they are much too thick for me and I think it would be better if they were thinner and larger (closer to 3x3) to really showcase the dulce de leche.

This is brownie is really rich and really needs milk to help offset its decadence. Oh and it's even better the second day. If they last that long ;) If you refrigerate your brownies to prolong the love, make sure to let it sit out at room temperature for at least 15 minutes before serving. It tastes much better at room temperature.

Better than Garlic Bread Focaccia

Adapted by Michelle from here


Even if it's not very traditional, I assure you that it's delicious. My rendition has dried herbs and chopped garlic in the dough and is topped with a savory crust of cheese and garlic salt. This is better than most garlic breads I've ever had and is delicious with soup. It would also make an excellent sandwich bread if baked in an 8x8 pan, cut into 4x4 pieces and split.

Ingredients

Yeast Proofing
  • 1/2 c. warm water (100F ~ 110F)
  • 1 tsp. sugar
  • 1 packet dry active yeast (not instant)

Wet Ingredients
  • 1/2 c. water
  • 2 garlic cloves, finely minced
  • 1 tbsp. olive oil

Dry Ingredients
  • 2 1/2 c. all purpose flour
  • 1 1/2 tbsp. dried basil
  • 1 1/2 tbsp. dried oregano
  • 1 tbsp. grated parmesan cheese

Topping
  • 2 tbsp. grated parmesan
  • 1 tsp. garlic salt
  • Olive oil

Proofing the yeast:
In your work bowl, dissolve the sugar in the warm water and sprinkle your dry yeast over it. Mix well and let sit for 10 ~ 15 minutes. If the mixture is frothy and smells yeasty, congratulations! Your yeast is alive and ready for the next step!

Mix together your dry ingredients in a separate work bowl.

Making the dough:
Add your wet ingredients into the yeast mixture: the water, garlic and olive oil. Begin to incorporate your dry ingredients.

If you're using a stand mixer, mix in about 1 cup of the dry ingredients at low speed. You could use your paddle attachment but keep in mind you're going to have to switch to a hook for the dough kneading anyhow. Once the first cup or so is well incorporated, continue to add about 1/4 c. of the dry ingredients at a time until the dough comes together into a ball. Once the dough comes together, knead using the dough hook for about 3 to 4 minutes until smooth and elastic. Once this has been achieved, form the dough into a ball and place in a greased work bowl (your mixer bowl works fine), cover and set in a warm place to rise for 30 minutes.

If you're doing this by hand, use a wooden spoon to mix in 1 cup of the dry ingredients to form a wet batter. After it forms a batter, gradually add the rest of the dry ingredients in 1/4 c. additions. It will get increasingly difficult as you reach the end. Once it forms a dough that can hold together, knead on a floured board until smooth and elastic. (And/or until your arms fall off, whichever comes first.) Form the kneaded dough into a ball and placed into a greased work bowl. Cover and set in a warm place to rise for 30 minutes.

Forming and proofing the dough:

Place an empty pan in the lowest rack of your COLD OVEN. Do not turn the oven on. You will proof the bread in a warm, moist environment provided by the boiling water. In the meantime, boil water.

Grease an 8x8 or 11x13 pan.

After the dough has risen, turn the risen dough out into the greased baking pan of your choice. There's no need to punch it down because you will punch it down as you form it to the pan. If it very elastic and doesn't want to get into the corners, don't worry. It will rise a second time.

Place your formed dough on the higher rack in your COLD oven. Fill the pan below it with boiling water. Close the oven and let your bread proof in this environment for 30 minutes.

Topping and baking the bread:

After 30 minutes, remove the bread pan from your oven. Discard your pan of hot water; you no longer need it. Preheat the oven to 450F.

Dimple the top of your dough lightly with your fingers. sprinkle the top evenly with the grated cheese and garlic salt. Drizzle the top of the dough with olive oil.

Bake the foccacia for 15 minutes at 450F. Remove from oven when golden brown and delicious. Cool in pan for 5 minutes and then remove to a cooling rack for 10 minutes. Slice and enjoy.